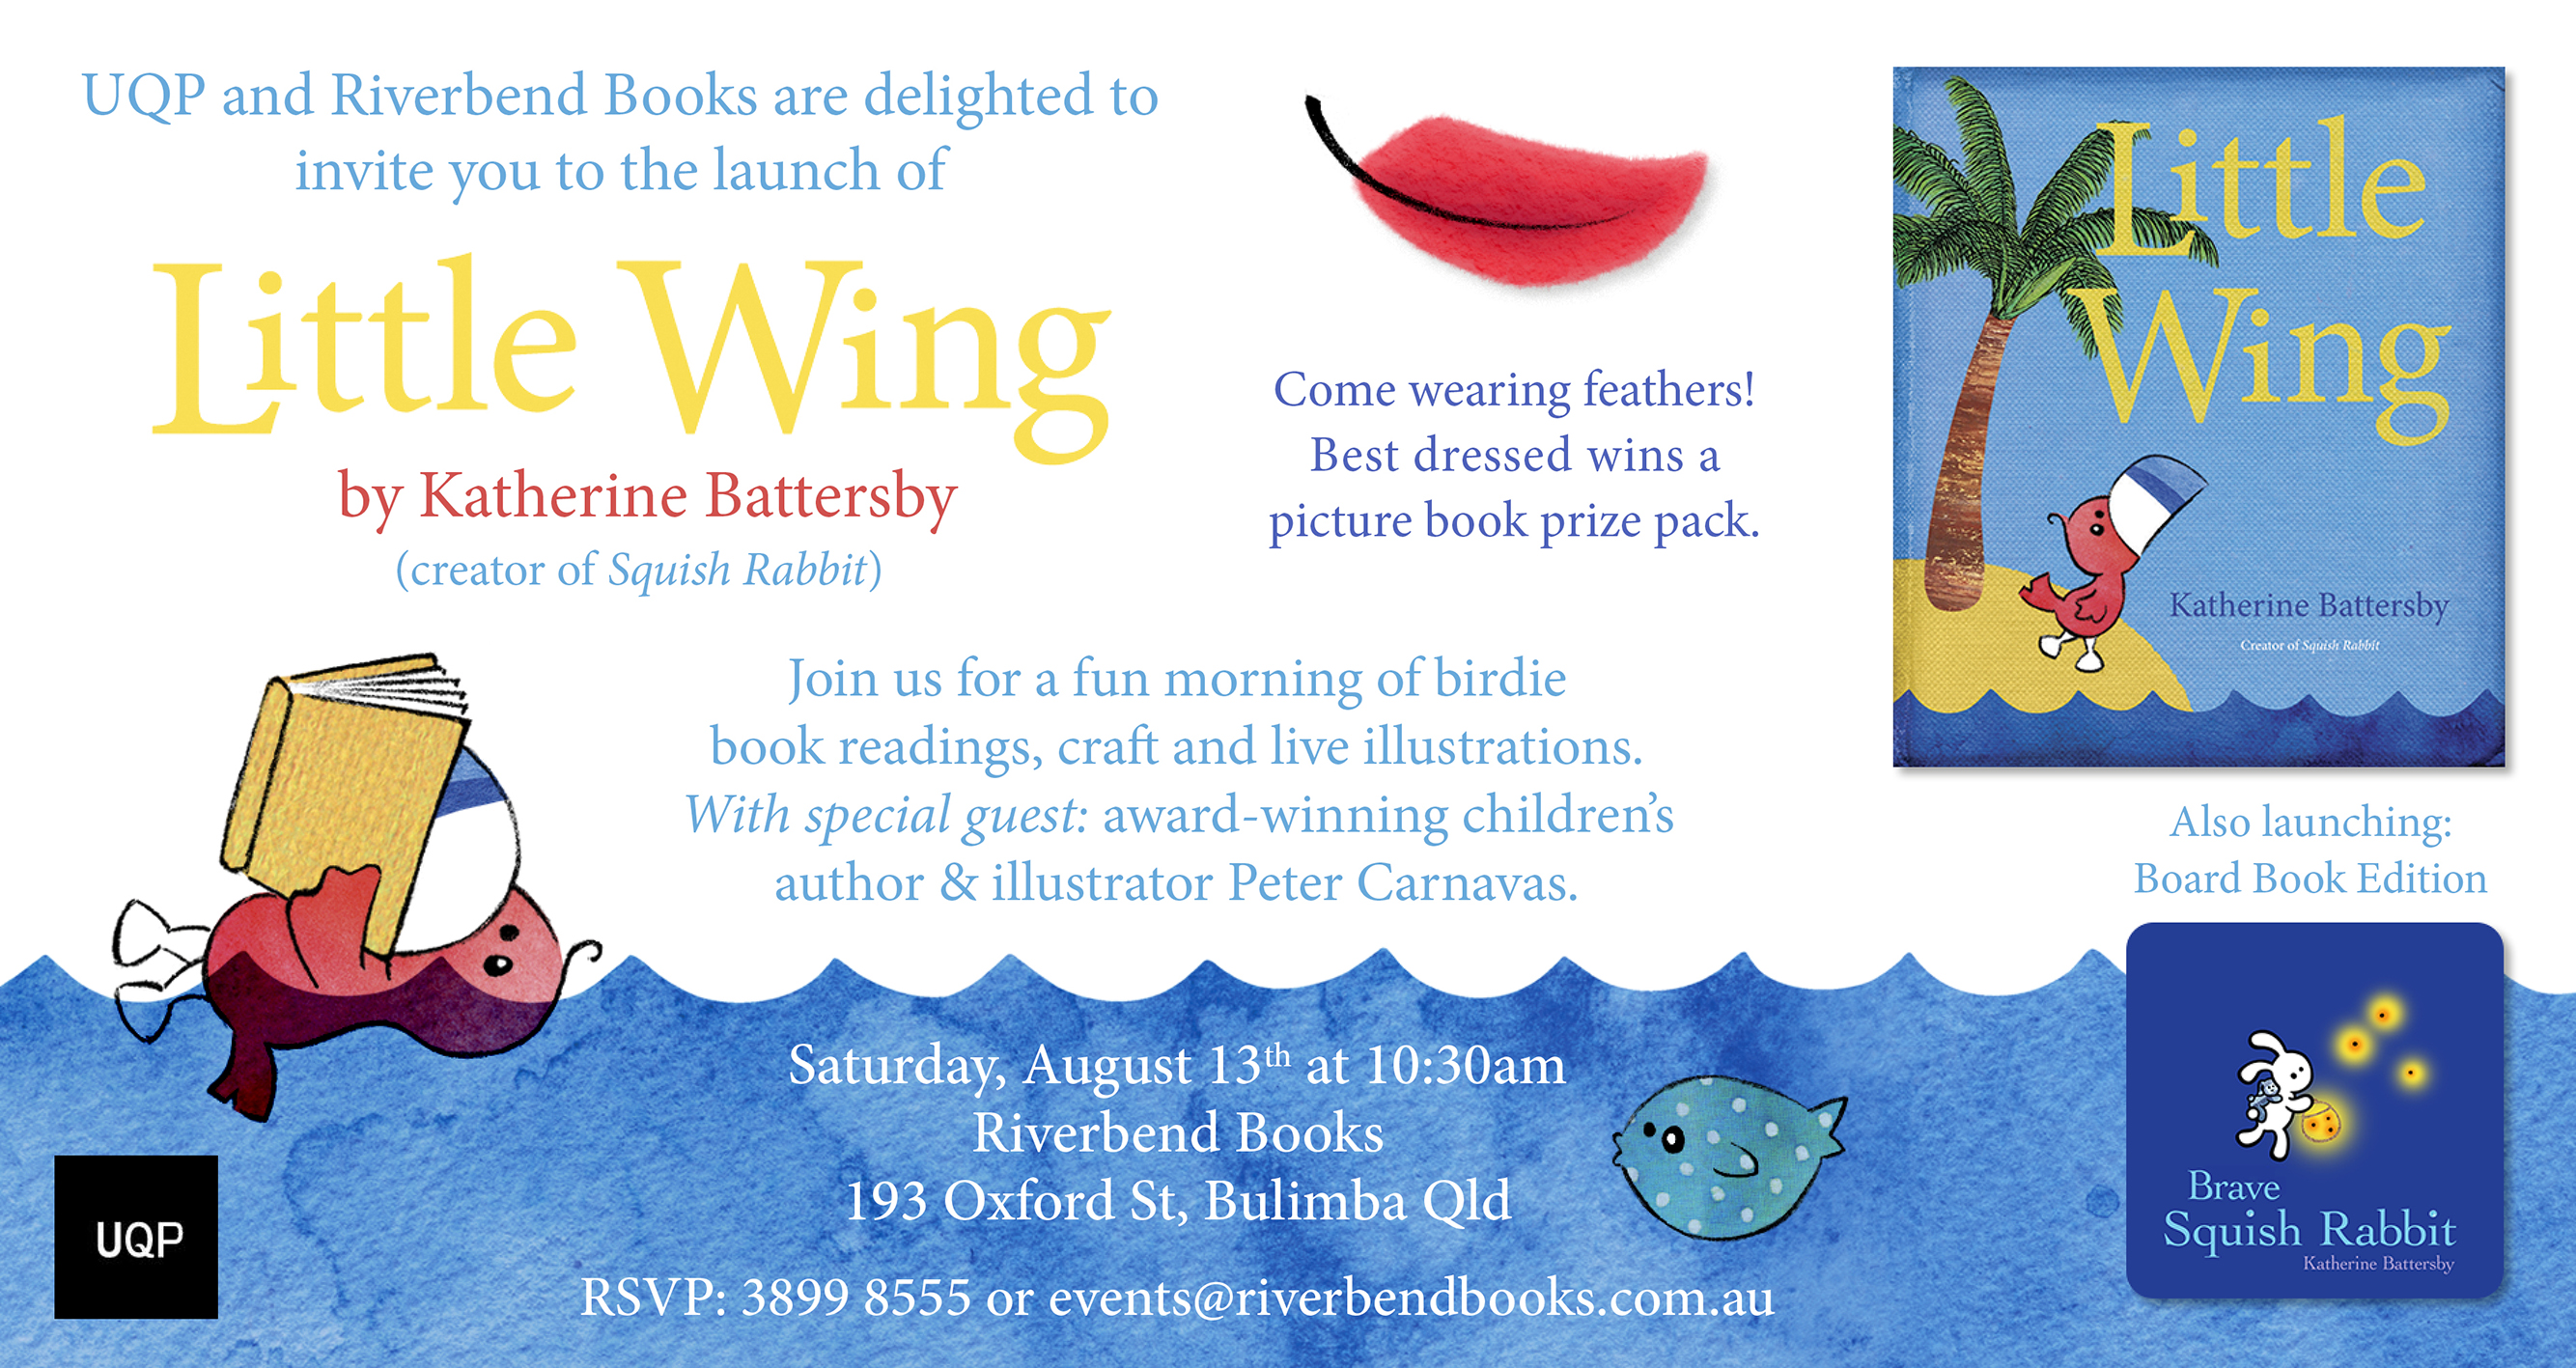
 I am now just weeks away from my first trip back to Australia in over two years. While down under I’ll be launching my latest book, Little Wing (at Riverbend Books), as well as visiting many amazing schools, public libraries and various literary festivals. I’m so looking forward to seeing everyone and meeting lots of little readers!
Unfortunately I won’t be running any workshops for adult writers this time around, however I am doing a number of public readings and workshops for children, so if you have a young reader / writer / creator in your life, feel free to bring them along. If you’d like to catch me, here’s where I’ll be:
AUGUST
- Sat 13th: Launching Little Wing at Riverbend Books, Brisbane
- All welcome! See the invitation (above) or the Facebook event and please RSVP to the bookstore.
- Mon 15th: Sunnybank Hills Library
- Free event. See more details here.
- Tues 16th: Grange Library
- Free event. See more details here.
- Tues 16th: Carindale Library
- Free event. See more details here.
- Wed 17th: Kenmore Library
- Free event. See more details here.
- Wed 17th: Wynnum Library
- Free event. See more details here.
- Thurs 18th – Fri 19th: Toowoomba Gammar School (private event)
- Sat 20th: Beenleigh Library
- Free event. See more details here.
- Sat 20th: Marsden Library
- Free event. See more details here.
- Mon 22nd: Paddington C&K Kindergarten (private event)
- Tues 23rd: John Paul College (private event)
- Wed 24th: Islamic College of Brisbane (private event)
- Thurs 25th: Ashgrove Literature Festival
- Read more about this amazing festival here or see what they’re up to on their Facebook page.
SEPTEMBER
- Wed 7th – Sun 11th: Brisbane Writers Festival
- I’ll be doing a number of talks for young readers (find out more here) and will be around the festival each day, signing books and meeting little readers.
In between events you’ll likely find me in coffee shops, bookstores, weekend markets, by the river, on the beach and anywhere that houses friendly faces and serves tea. Following my time in Australia I’ll also be sneaking off to Vietnam for a few weeks to eat pho and dumplings, explore the mountains and find a little patch of beach to borrow.
See you soon, Australia…